SatisMeter helps you understand how your customers see your product, by automatically collecting customer feedback using Net Promoter Score (NPS), Customer Satisfaction (CSAT or CES), or Product-market fit (PMF) surveys on an ongoing basis. Let's begin by creating and launching your first SatisMeter Survey.
In this article:
- Creating a Survey
- Designing your survey
- Setting a thank you message
- Selecting a survey channel
- Review the survey
Creating a Survey
Create your first survey by clicking on the New Survey button in the navigation panel on the left or use the survey designer link from the getting-started guide.
The first step is to choose one of the templates provided or create it from scratch.
You can select from one of the four templates below or by creating a survey from scratch:
- NPS Survey - Measure long-term customer satisfaction and loyalty, giving you a strong indicator of growth and product performance.
- CSAT Survey - Measure customer satisfaction with a specific experience. Identify areas for improvement for a particular value that you provide.
- CES Survey - Measure the ease of user experience for specific interactions with your service. CES is used to get quick and focused feedback.
- PMF Survey - Measure the uniqueness of your service (as perceived by your users). A good result strongly correlates to your ability to gain traction (grow fast).
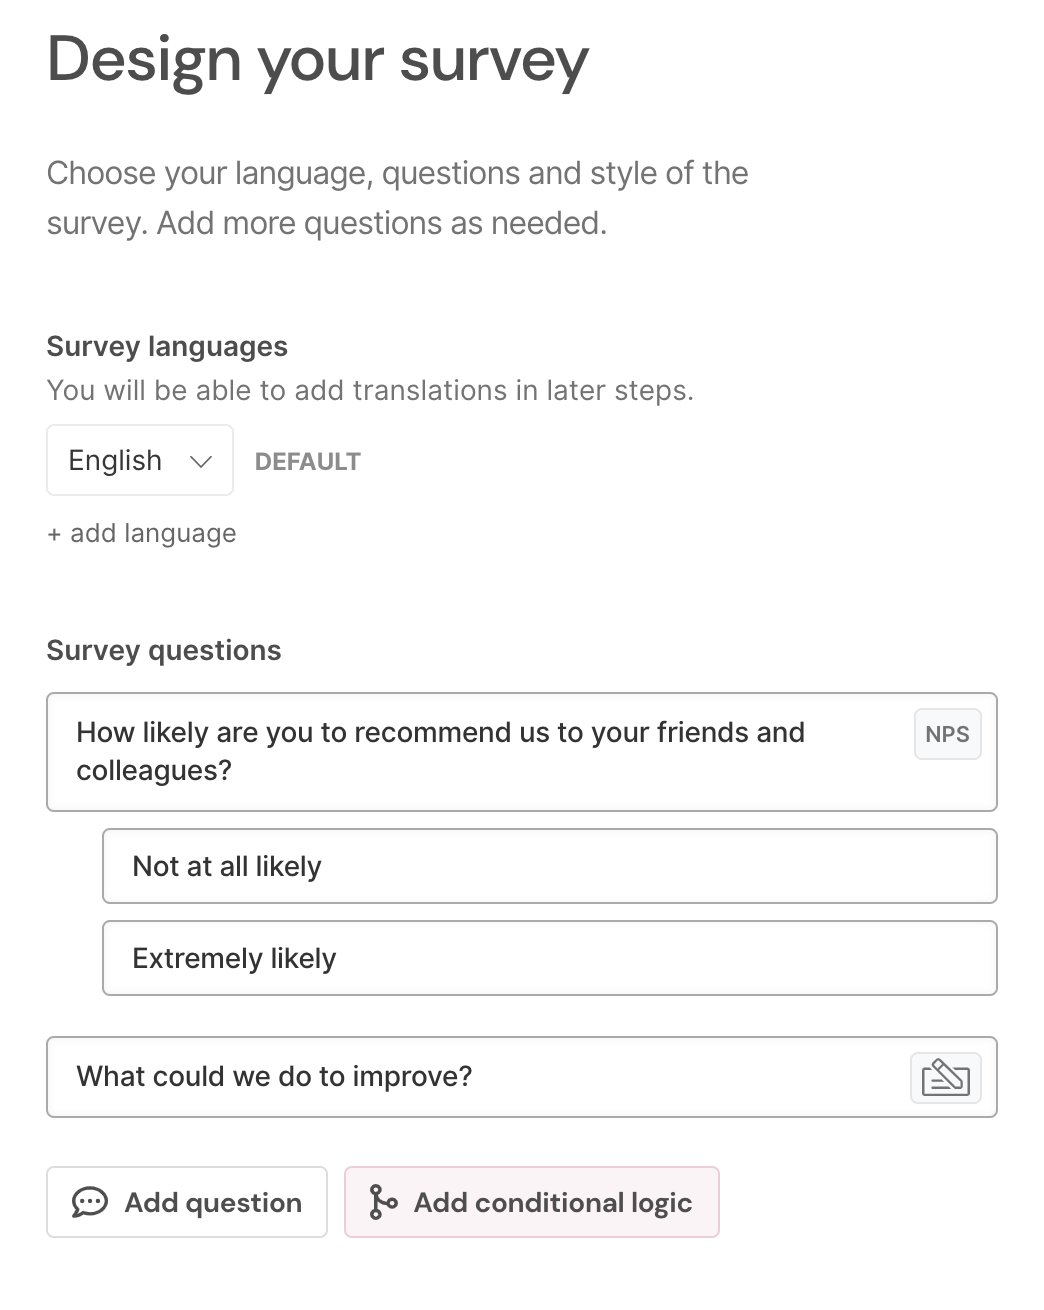
Designing your survey
Once you select a template, the next step is the Design. Here is where you can adjust the survey to better match your use case by adding custom questions (which can be ratings, pre-defined choices, or open-ended questions), adding Condition Logic, and also setting up the survey languages.
Setting a thank you message
When you have built out your survey questions the next step is the Thank-You section.
In this section, you can specify what thank-you message should SatisMeter display to your customers based on the score given, or a standard message for all.
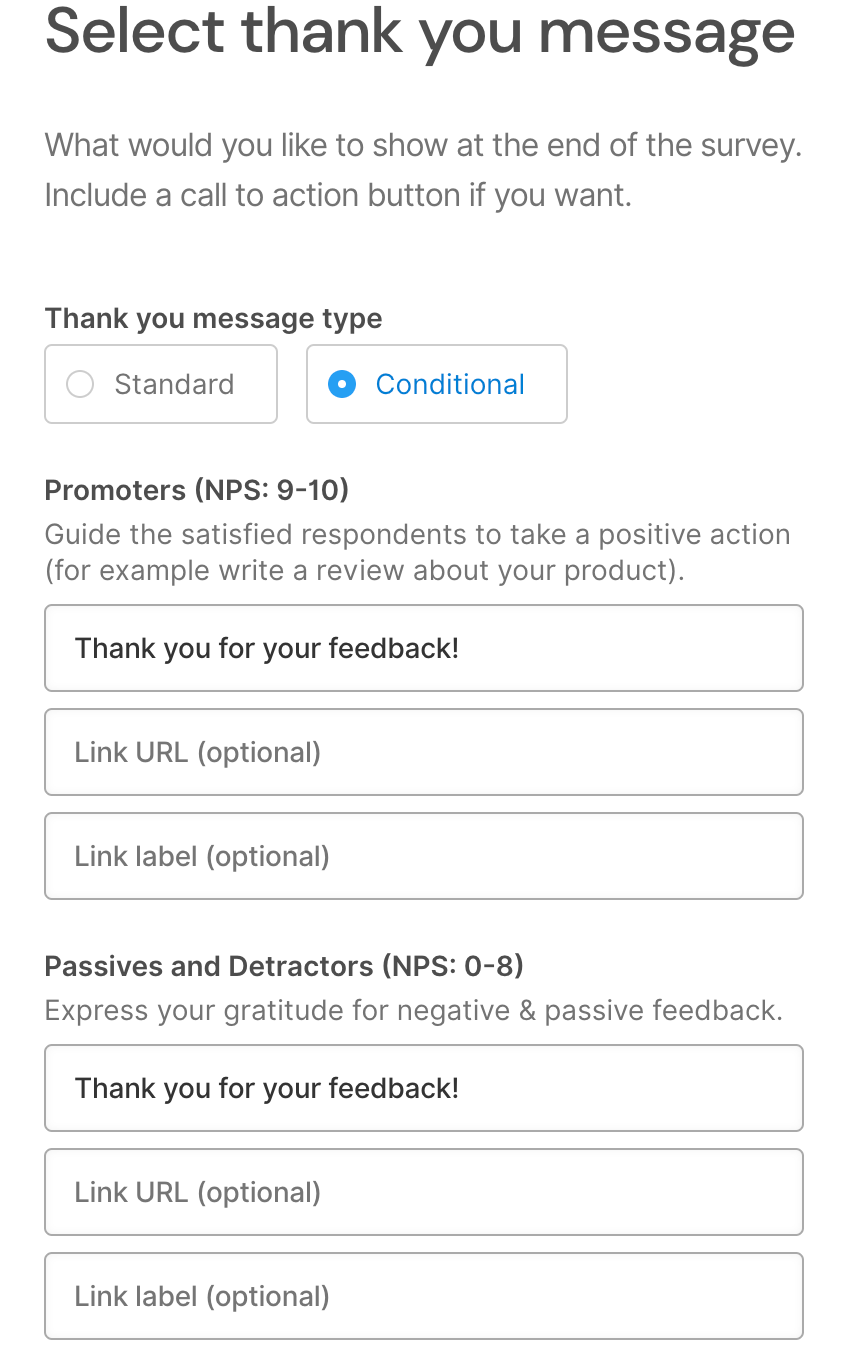
Whether you will face a happy or unhappy customer, you can now adapt your Thank-you Message to the situation, and drive your promoters and detractors to different actions.
Selecting a survey channel
When you are satisfied with the content of your survey, you can move along to choose the Channel where the survey will be displayed.
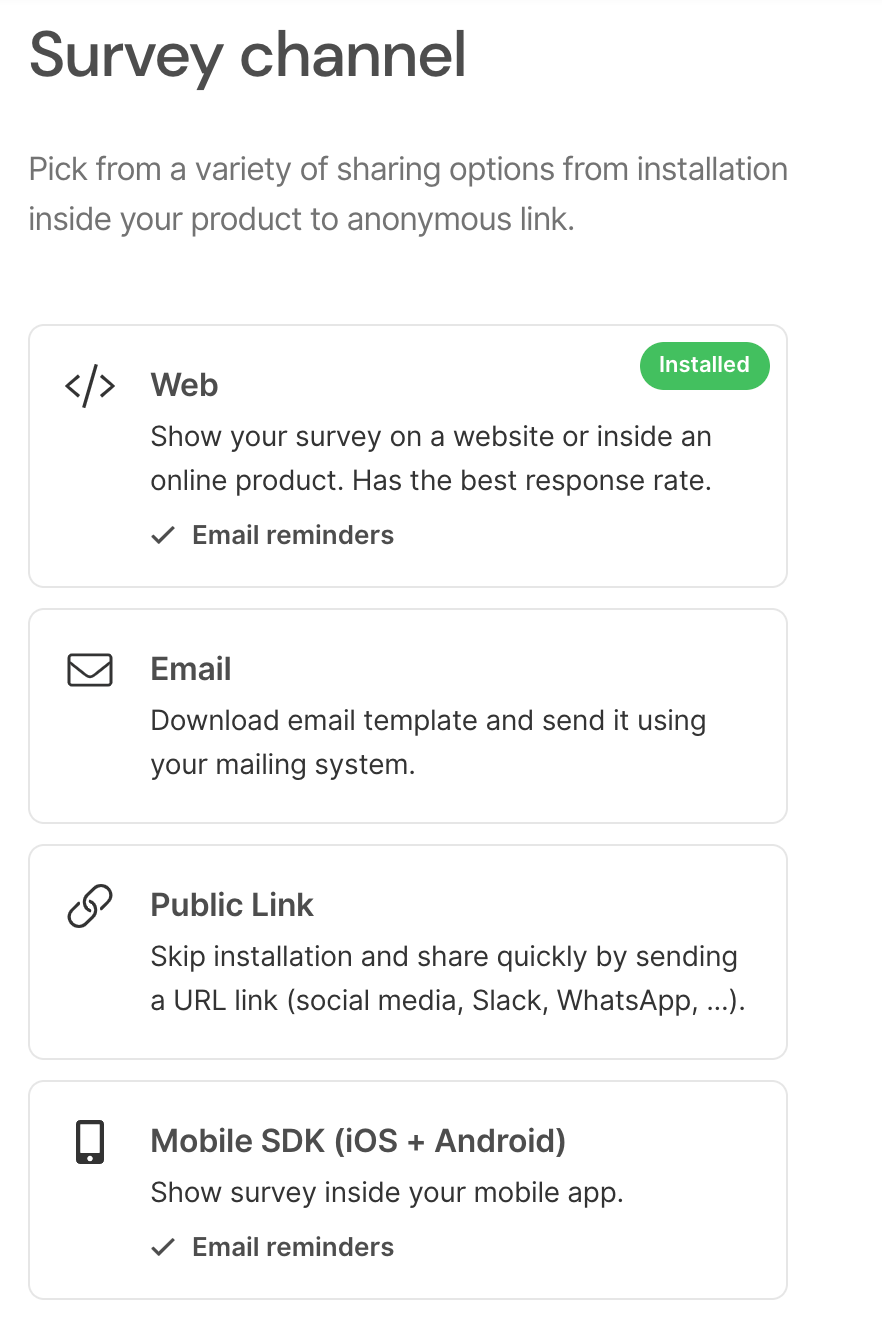
You can send your survey using one of the following channels
- Web (Public Website or Web-App).
- E-mail.
- Public Links.
- Mobile SDK for both iOS and Android.
Note: Survey delay and Custom Follow-up Questions are not supported in mobile SDKs right now.
The instructions might vary depending on which channel you select. The platform will guide you through the remaining setup, but if you have any doubts about specific parts of it, feel free to reach out to our Support Team or check the articles linked above.
Review the survey
The last step of the Survey Designer is the Review section. This is your chance to have an overview of the whole setup, and see the final product on the Live Preview in the right panel.
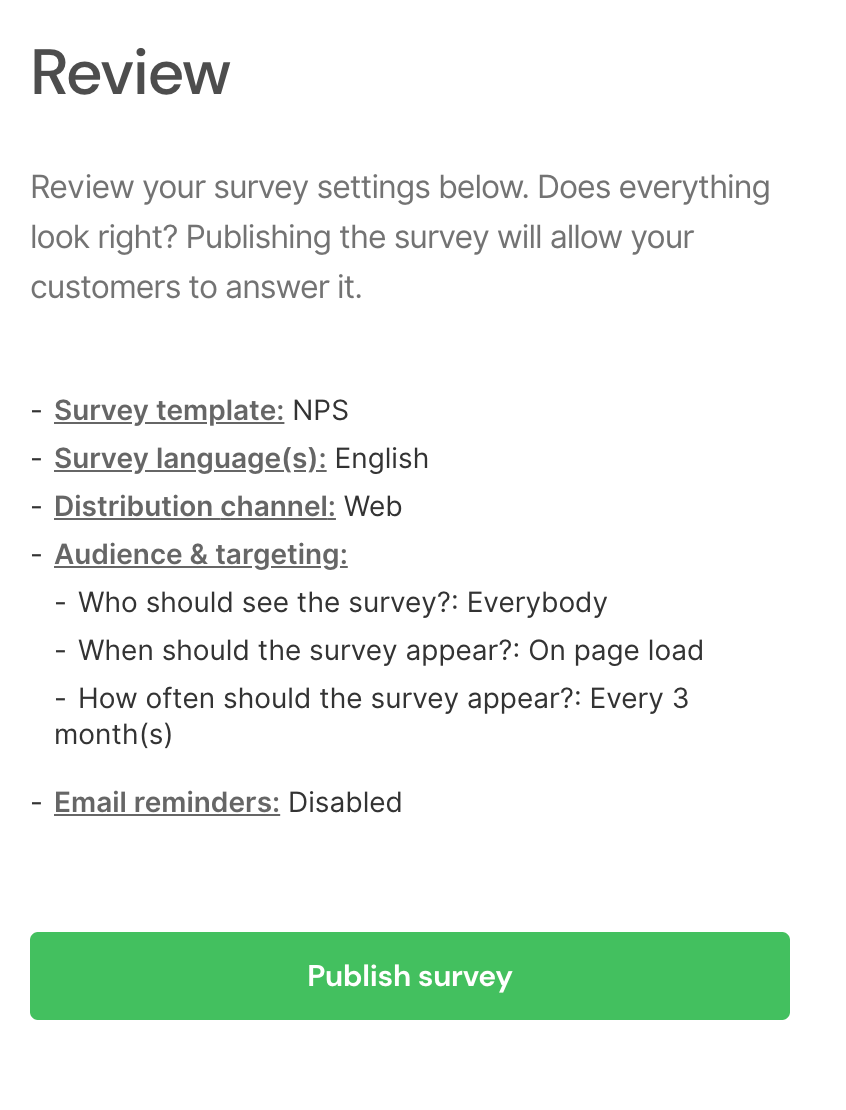
Whenever you are ready, hit that Publish survey button and set your survey live. 💪